Why download your Photobucket images?
Earlier this year, Photobucket changed their Terms and Conditions fairly silently, to prevent linking of images on their service on 3rd party websites for free. Instead, users who had posted Photobucket links to their images on another website saw this ugly prompt to upgrade their account.

Photobucket had already done this for users when they reached a very high bandwidth usage, but previously an upgrade was only $25. Now the ability to hotlink your images from Photobucket comes with a steep $400/year price tag. Many users called it extortion and blackmail. Especially because users soon discovered the interface to download their images to then post them from their own website was broken. And, the option to upload an image in a support ticket with Photobucket was broken too. This left many users in a panic. There simply was no way to get their site working again.
Luckily, if you’re familiar with Terminal and Bash, there’s a pretty easy way to get your images back. Philip Jewell posted helpful steps on Github as well as images to help guide the way.
Get the Image Links
First, log into your Photobucket account and select the album of images you need (this process goes one album at a time). Choose an image or two in the album and a “Select all” box appears. Choose “Select all” and wait for your count of images in the bottom to update before continuing. Now navigate to the next album you’d like to download and repeat the process. Do this for all albums you need to download. Through this process your total images selected should continue to grow. When you’re finished, click “Link” at the bottom of your screen.
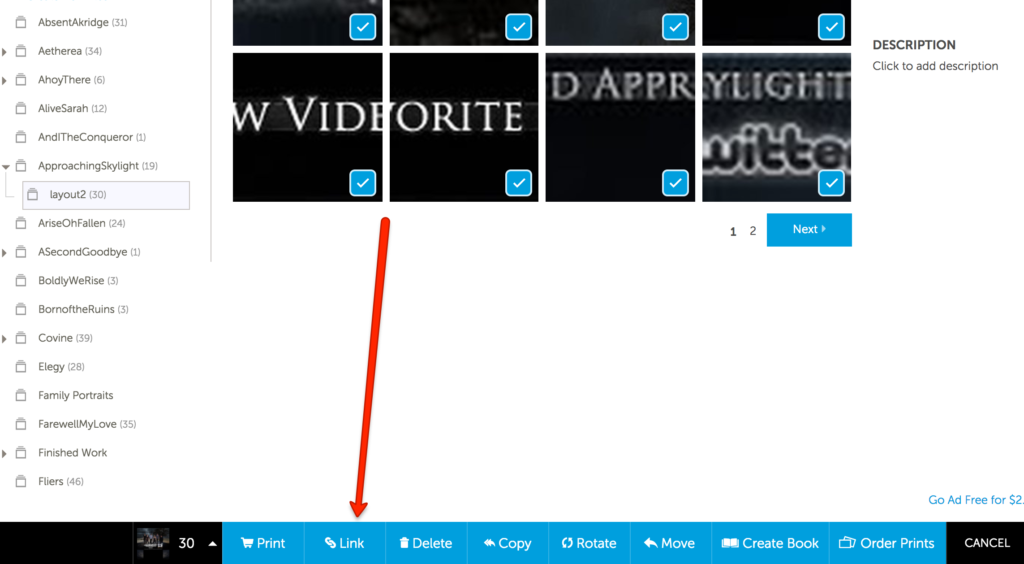
Photobucket will open a window containing all the direct links for your images in it. Clicking will copy the links to your clipboard.
From here, create a folder on your desktop called “photobucket.” Then open a text editor on your computer and paste your image links into it. Save it as a TXT file (e.g. my_photobucket_files.txt) to your “photobucket” folder on your desktop.
Now you are ready to download the files.
Please note: the following instructions are for users on Mac OS X. If you are using a Windows machine, users have provided solutions in the comments of Philip Jewell’s post on Github: https://gist.github.com/philipjewell/a9e1eae2d999a2529a08c15b06deb13d
Download your images
Now the fun part: downloading your images from Photobucket. In your Terminal application, paste the following commands:
cd ~/Desktop/photobucket

cut -d\/ -f 7 photobucket_files.txt | grep "\." | while read file; do grep "${file}$" photobucket_files.txt; done | while read file; do curl -O --referer "http://s.photobucket.com/" ${file}; done

cut -d\/ -f 7 photobucket_files.txt | grep -v "\." | sort -u | while read dir; do mkdir ${dir}; cd ${dir}; grep "/${dir}/" ../photobucket_files.txt | while read file; do curl -O --referer "http://s.photobucket.com/" ${file}; done; cd -; done
What is this command doing? It’s looping through all your images to download them, and using “http://s.photobucket.com/” as a referer. This tricks Photobucket into thinking the requests are coming from itself. This allows you to easily download your images you need without dealing with their buggy and ad-ridden interface, or dealing with their upgrade messaging.
Some users have also suggested using sed to take out IMG tags as well:
sed -i 's/\[IMG]//g; s/\[\/IMG]//g' photobucket_files.txt
That’s all there is to it! Hopefully this guide has helped you download your images so they can be uploaded directly to your site, store, forum, or wherever they were needed. Have any comments, questions, or notes to add? Let me know in the comments, or Contact Me.
You are a GOD. Thank you for helping me save my childhood memories! Can confirm May 2020 still works